How to Login(The Personal Genome Analysis division)
Introduction
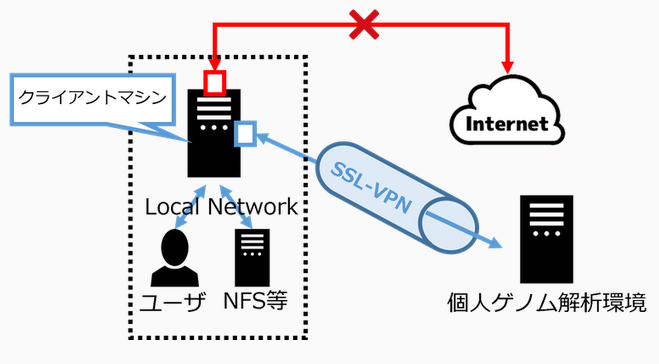
SSL-VPN connection is used for login and file transfer to the personal genome analysis division of the NIG supercomputer. For SSL-VPN connection, dedicated software called SSL-VPN Client software must be installed on the user's client machine.
Two-factor authentication is used for SSL-VPN connection. For the purpose of improving security, the client machine is set to block access to the Internet when it is connected using SSL-VPN. At this time, communication within the local network to which the client machine belongs is not blocked. Therefore, for example, if the client machine is connected to a file server in the local network, it is possible to send data from that file server to the personal genome analysis division without any problem. On the other hand, if you are working by connecting to the client machine with ssh from outside the local network, the ssh connection will be cut off.
But it is possible to use only HTTPS on the Internet from the personal genome analysis division due to the settings on the firewall of the NIG supercomputer.
How to log in to the Personal Genome Analysis Division
The outline of the connection procedure is shown in the figure below.

STEP 1. Installing FortiClient VPN Client software
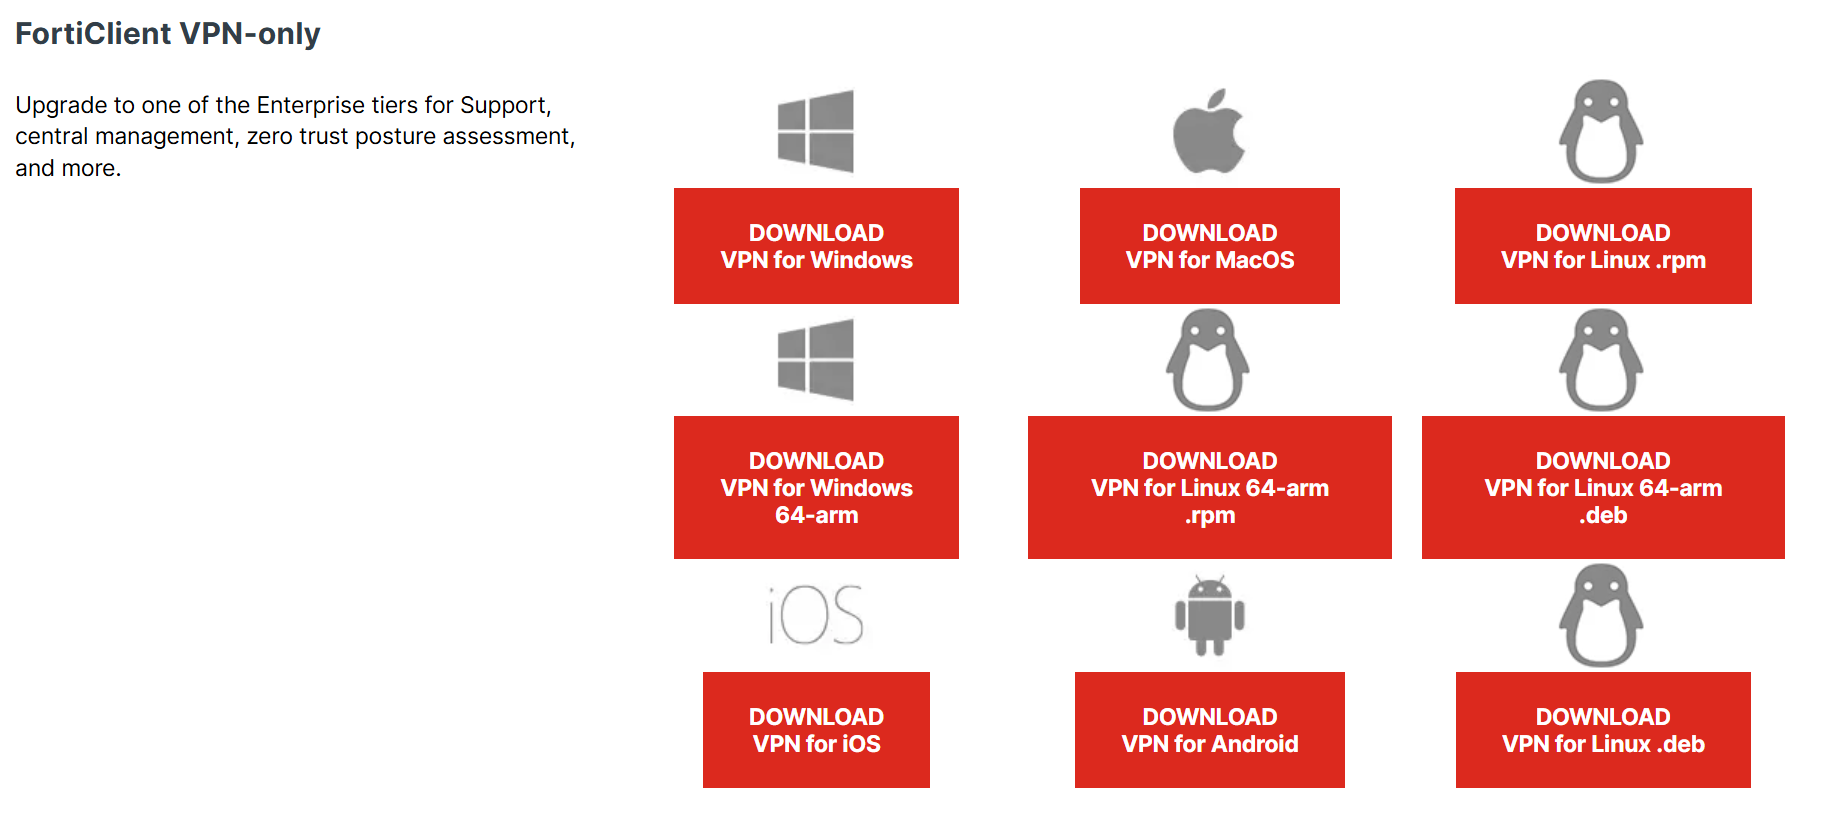
Download and install FortiClient on the official website of "🔗FortiClient".
- The Official Website:🔗https://www.fortinet.com/support/product-downloads
| You can use FortiClient 'FortiClient VPN-only' version for free. 'FortiClient VPN-only' is located at the very bottom of the 'Product Downloads and Free Trials' page. Please download 'FortiClient VPN-only' from the bottom of the 'Product Downloads and Free Trials' page. |
For more information on how to download and install it, see the links below.
- Installing FortiClient VPN Client software (Windows)
- Installing FortiClient VPN Client software (MacOS)
- Installing FortiClient VPN Client software (Linux)
STEP 2. Configure the SSL-VPN client
Set up the SSL-VPN client.
To set up, see the link below.
- Configure the SSL-VPN client (Windows)
- Configure the SSL-VPN client (Mac)
- Configure the SSL-VPN client (Linux)
STEP 3. Connecting to the VPN
You should connect to the SSL-VPN before logging in to the prsonal genome analysis division.
- Windows
- MacOS
- Linux
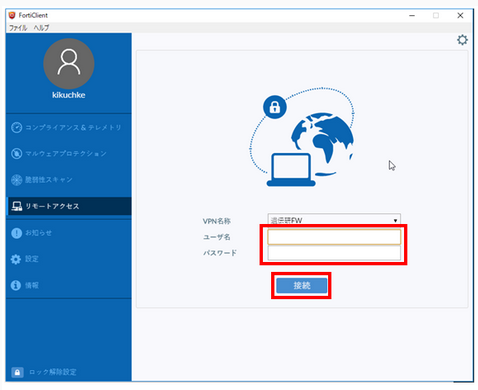
For Windows, connect using the FortiClient GUI.
- Enter 'User name' and 'Password'.
- 'User name': enter the account name for the personal genome listed in the 'Usage category: personal genome analysis division' on the account registration card.
- 'Password': enter the SSL-VPN password 'initial password' sent by SECURE DELIVER return mail.
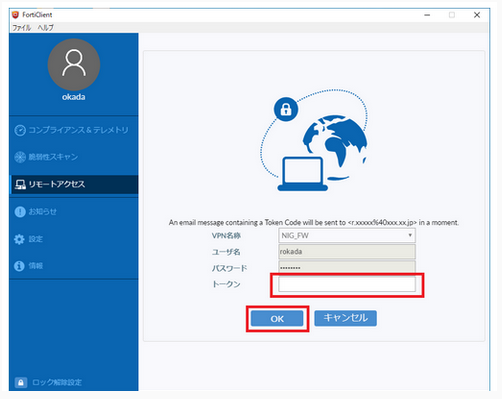
- A one-time password will be sent to the email address linked to the SSL-VPN account.
- Enter the one-time password (In the example below, it is 269274.) in the "Token" field and click "OK".
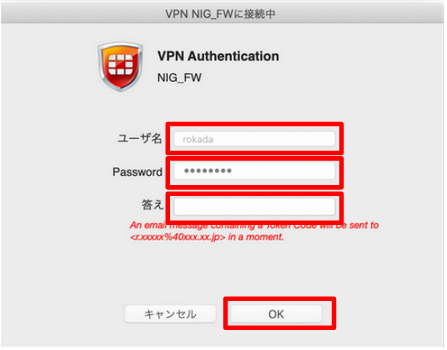
For MacOS, connect using the FortiClient GUI.
- Enter 'User name' and 'Password'.
- 'User name': enter the account name for the personal genome listed in the 'Usage category: personal genome analysis division' on the account registration card.
- 'Password': enter the SSL-VPN password 'initial password' sent by SECURE DELIVER return mail.
- A one-time password will be sent to the email address linked to the SSL-VPN account.
- Enter the one-time password (In the example below, it is 269274.) in "Answer" and click "OK".
For Linux, connect using the openfortivpn CUI.
- Specify the configuration file as an argument and execute the command as follows.
sudo openfortivpn -c config
For configuration instructions, refer to STEP 2: "How to Configure the SSV-VPN Client (Linux)".
- A one-time password will be sent to the email address linked to the SSL-VPN account.
- Enter the one-time password (In the example below, it is ikani269274.) interactively as shown below and press the Enter key.
An example of the command execution is shown below.
$ sudo openfortivpn -c config
INFO: Connected to gateway.
Two-factor authentication token:
INFO: Authenticated.
INFO: Remote gateway has allocated a VPN.
Using interface ppp0
Connect: ppp0 <--> /dev/pts/1
INFO: Got addresses: [10.212.134.11], ns [133.39.221.65, 133.39.222.41]
INFO: negotiation complete
INFO: negotiation complete
local IP address 10.212.134.11
remote IP address 192.0.2.1
INFO: Interface ppp0 is UP.
INFO: Setting new routes...
INFO: Adding VPN nameservers...
INFO: Tunnel is up and running.
If you have trouble connecting, refer to FAQ.
STEP 4. SSH log in to the gateway
After connecting to the SSL-VPN, launch a terminal emulator and execute the following command to log in to the gateway of the personal genome analysis division.
There are two gateway nodes, gwa.ddbj.nig.ac.jp and gwa2.ddbj.nig.ac.jp. You can log in by executing the following commands, respectively.
ssh [username]@gwa.ddbj.nig.ac.jp
or
ssh [username]@gwa2.ddbj.nig.ac.jp
For questions on how to login, Refer to FAQ.
Logging in to the analysis server using SSH
The personal genome analysis division is a node rental, so the user logs in to the borrowed node by SSH from the gateway. The name of the relevant node will be provided at the start of use.