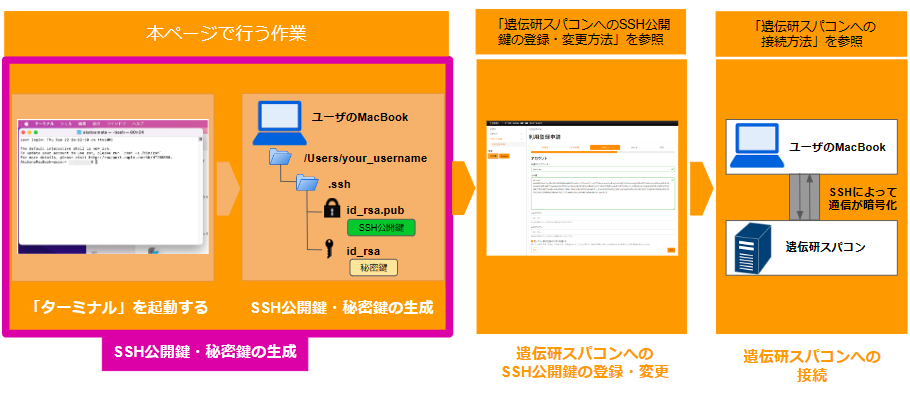
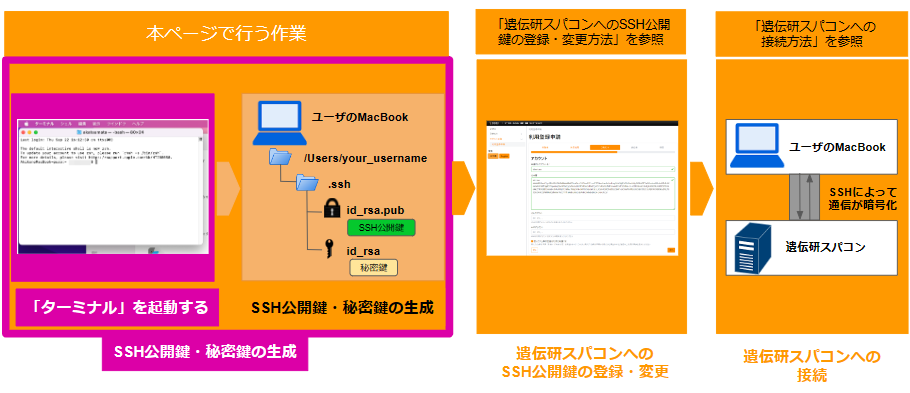
How to generate SSH public and private keys (mac)
This page provides detailed completion instructions when creating SSH public key with macOS.
Procedure is as follows.
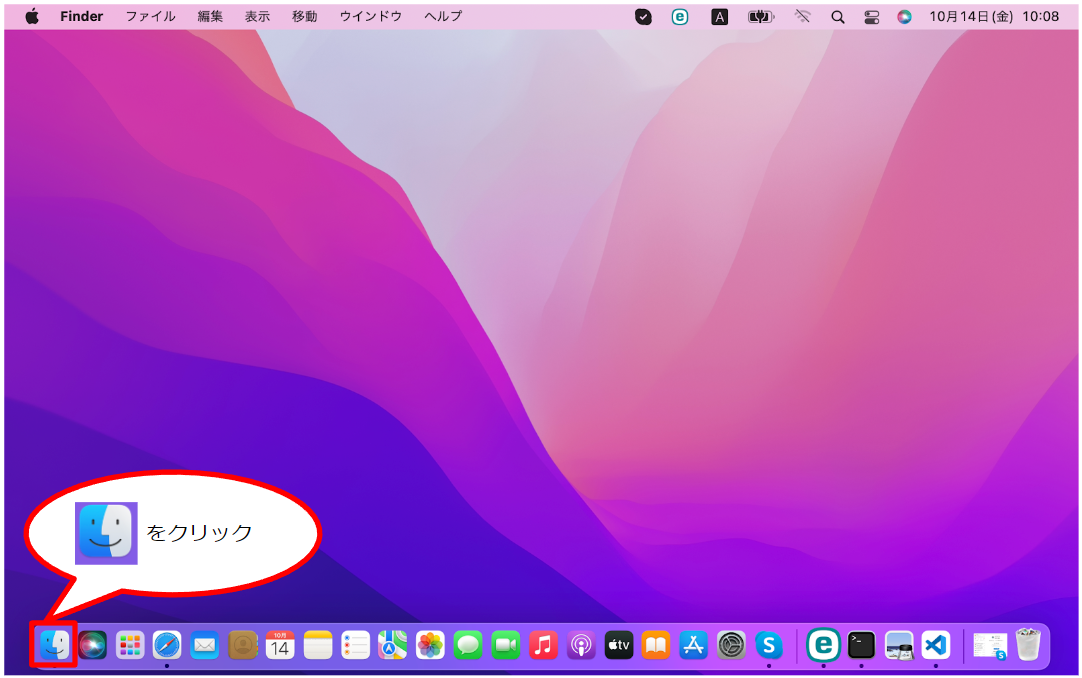
Open Terminal on Mac
First, click 'Finder'.
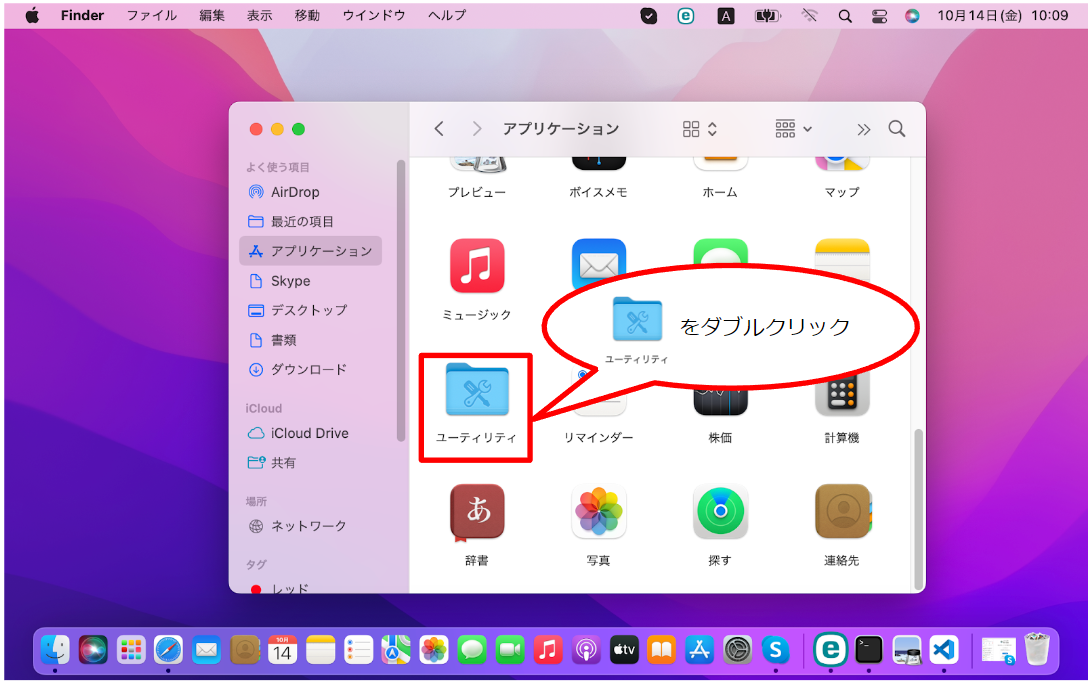
Next, click 'Applications'.

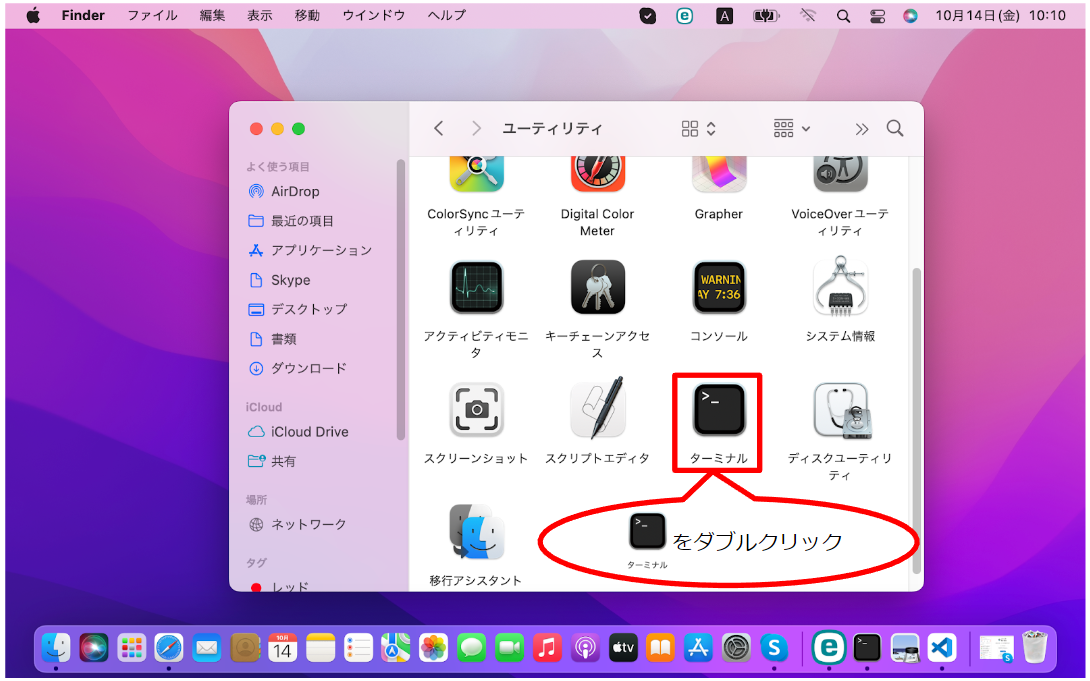
Then, double-click 'Utilities'.
And Finally, double-click 'Terminal'.
Terminal will be opened.

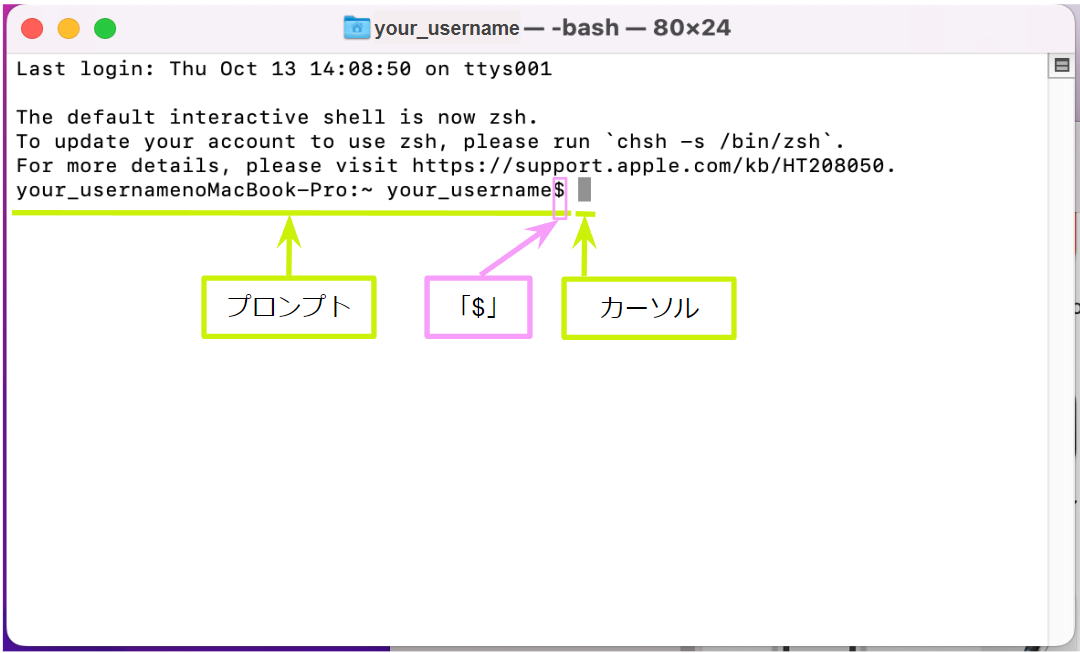
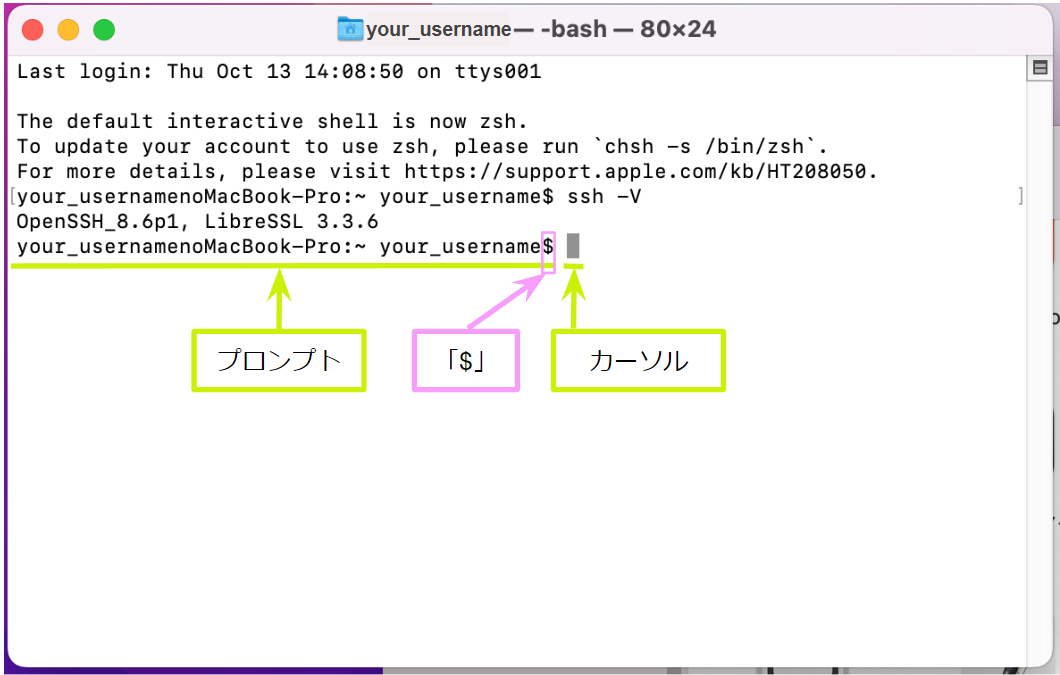
At this point, the Terminai screan appears as follows.

When the Terminal screan appears, you can see a prompt. The prompt ends with '$'. When the prompt appears, you are ready to enter commands. The square box after the prompt is called Cursor, where you enter commands.
- When entering commands, do not type '$'. It is automatically displayed on the Terminal. You don't need to enter it.
- You don't need to click '$' or Cursor using the mouse. When Cursor appears, enter the command as it is and press the 'enter' or 'return' key. The mouse is not used.
Once you have verified that the prompt and cursor appear, check that openSSH client is installed before creating the SSH public key and private key.
OpenSSH client is a software, which is used to create SSH public key and private key, and to execute commands to communicate with NIG supercomputer using SSH. If it is not installed, you will not be able to do any further work, so check here.
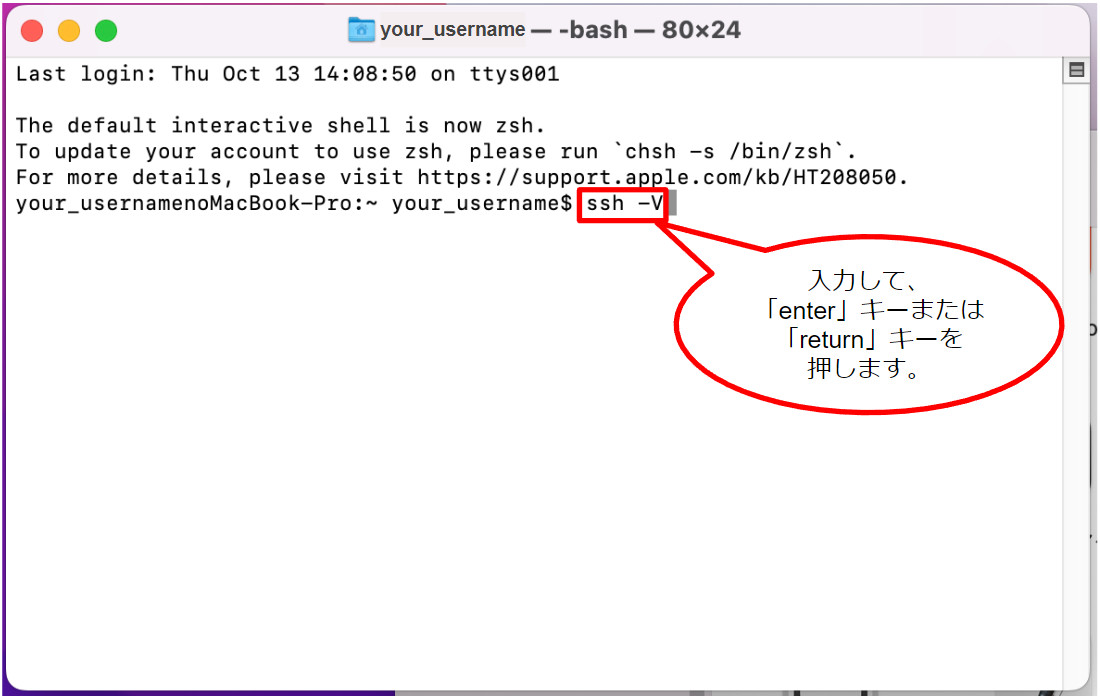
Enter the following command and press the 'enter' or 'return' key.
ssh -V
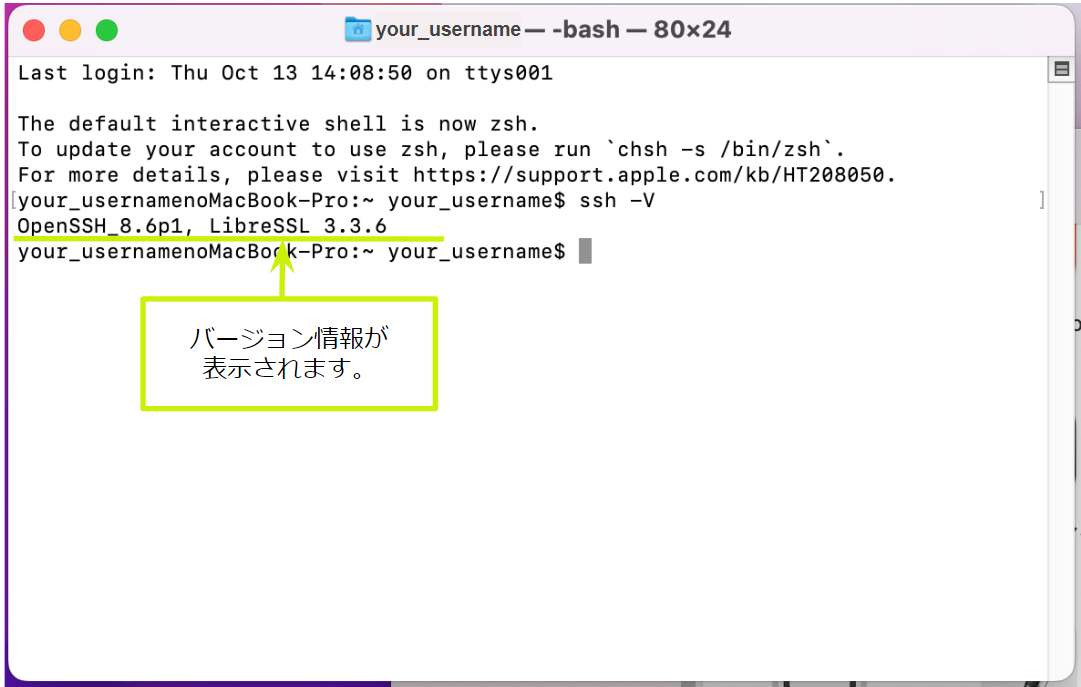
The version information of opensSSH client will then be output as follows. Version 8.6p1 is installed by default in macOS Monterey 12.6. (as of 13 Oct 2022).
If the version information is output, then it is installed and you can move on to the next step of 'Create SSH public key and private key'.
It is recommended to use the latest version. You can check more information about the latest version on the official OpehSSH website.
If the following screen appears, it is not yet installed. Click here to refer to the FAQ and install openSSH client.

Create SSH public key and private key

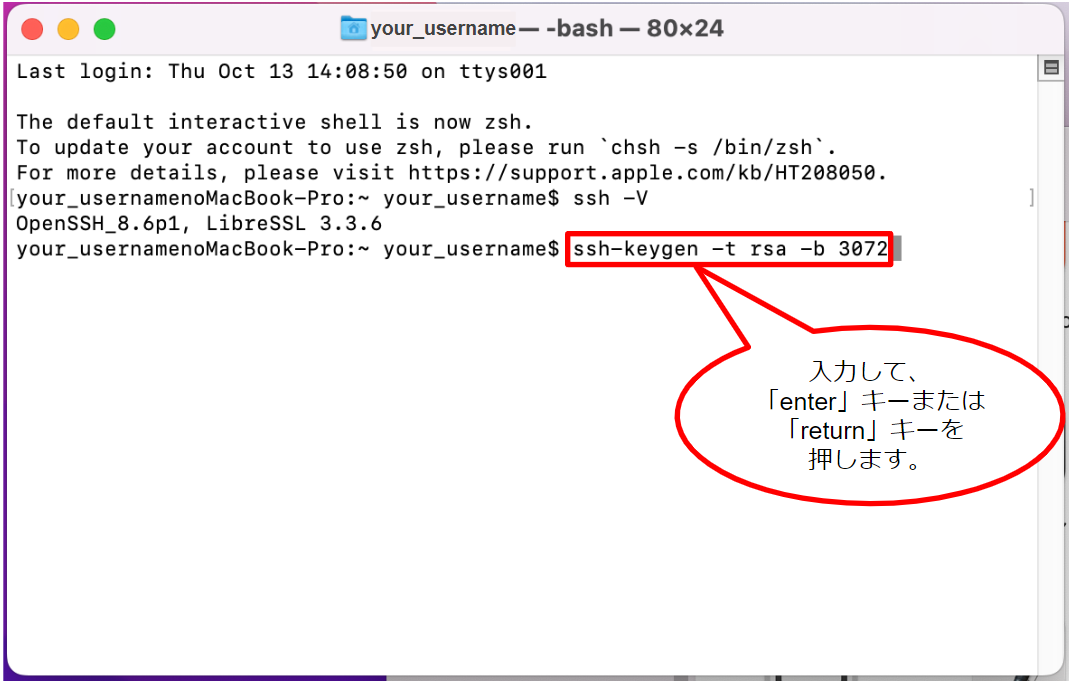
When a new prompt and cursor appear on the line following the line with version information, you can type the command again.
Type the following command and press the 'enter' or 'return' key.
ssh-keygen -t rsa -b 3072
Then, two lines are output as the following screen.
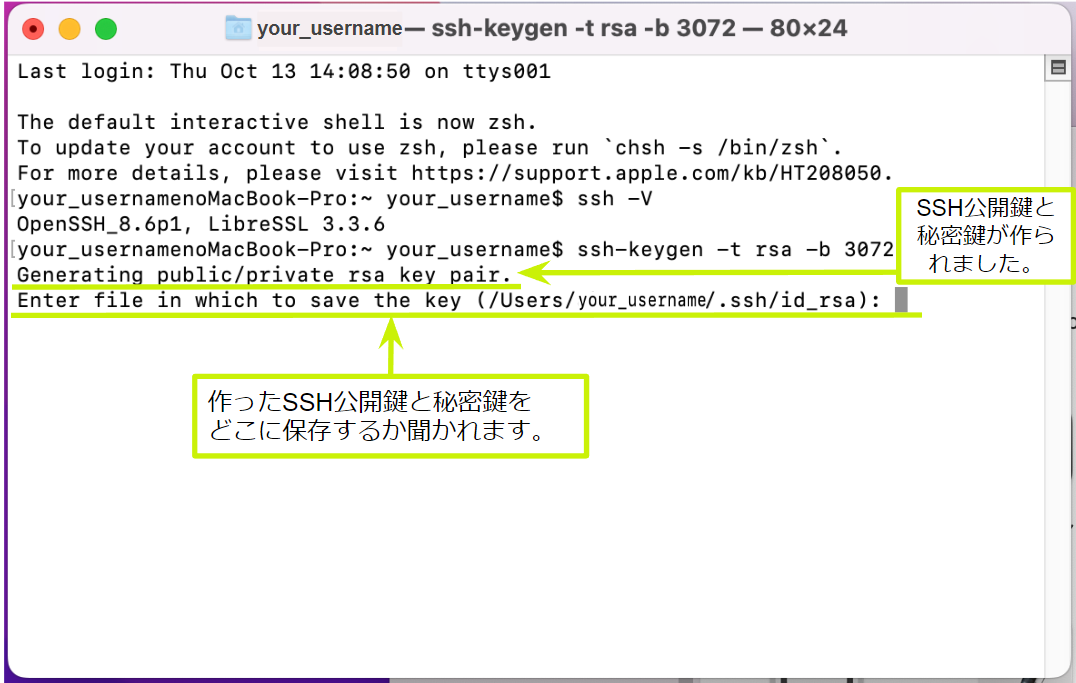
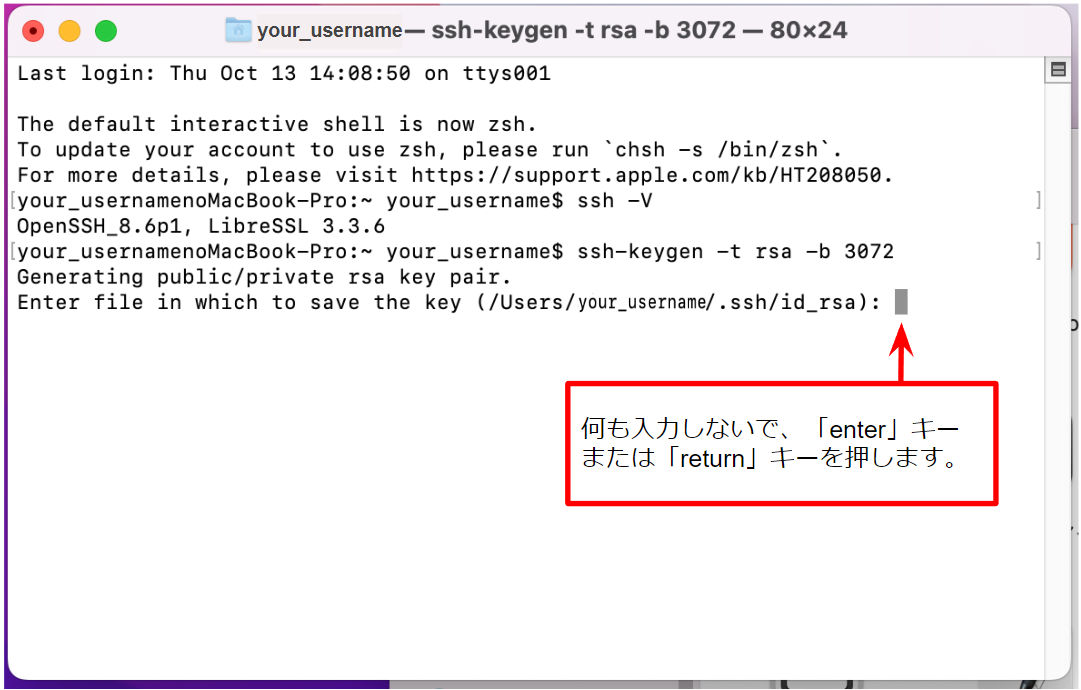
You are asked to Enter file in which to save the key (/Users/your_username/.ssh/id_rsa):. This means: "Where in your PC do you want to save the SSH public key and private key you created?".
Normally, do not type anything and just press the 'enter' or 'return' key.
Two lines will then be displayed, as shown in the following screen.
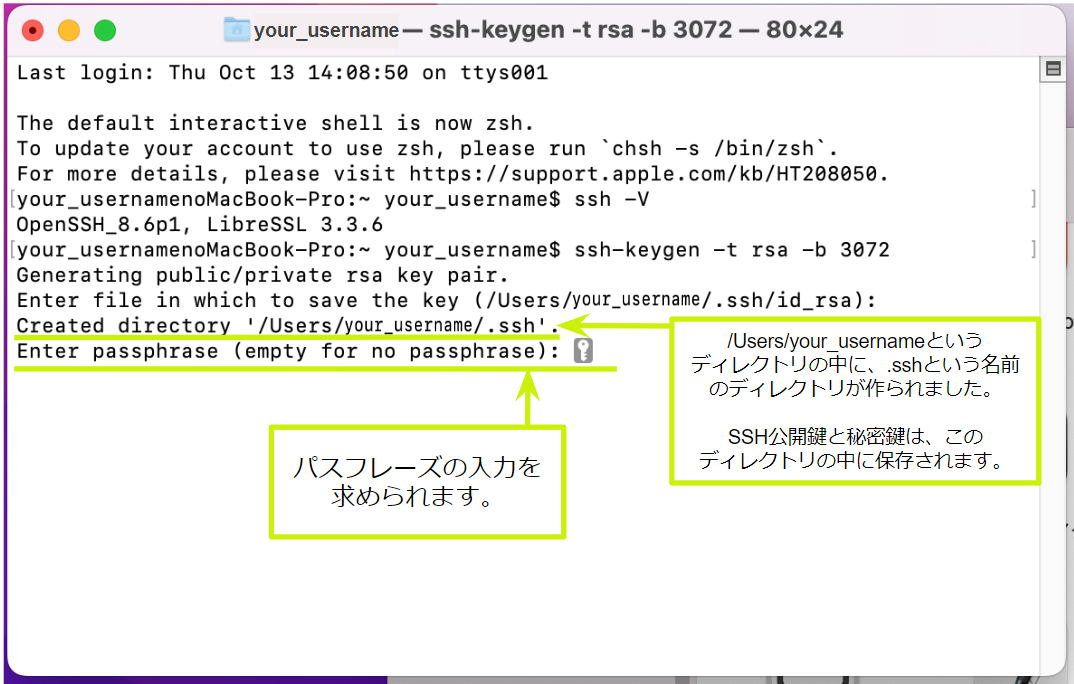
The message Enter passphrase (empty for no passphrase): is displayed. Enter your passphrase here.
The passphrase is different from the NIG supercomputer password. It can be any long string of characters. The passphrase is supposed to be a long random string of characters, including spaces, such as the first line of a page when you open random a book.
| SSH treats possession of a private key file as evidence of identity. If the private key file is stolen, impersonation is possible. Although it is possible to omit the passphrase setting, it is strongly recommended to set it to reduce the damage in the event of private key theft. |
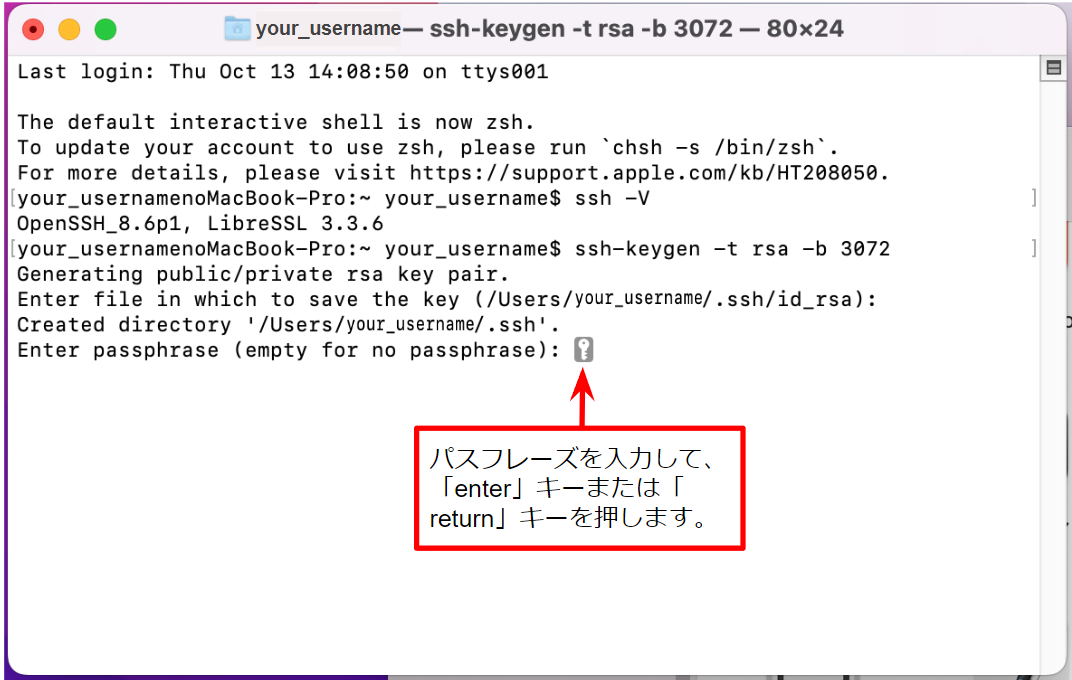
Enter the passphrase and press the 'enter' or 'return' key.
❗ After entering the passphrase, the screen remains as shown below and nothing changes. While entering the passphrase, the screen also remains as shown below and nothing changes, but do not worry about it and continue entering. When you have finished typing, press the 'enter' or 'return' key.
You will then see the following screen.
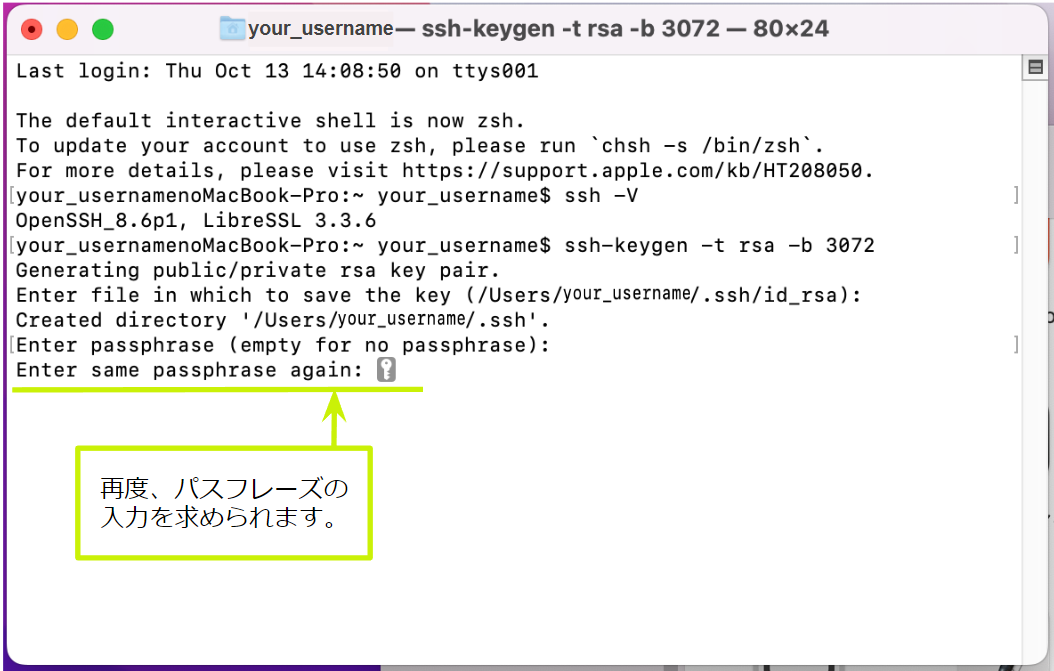
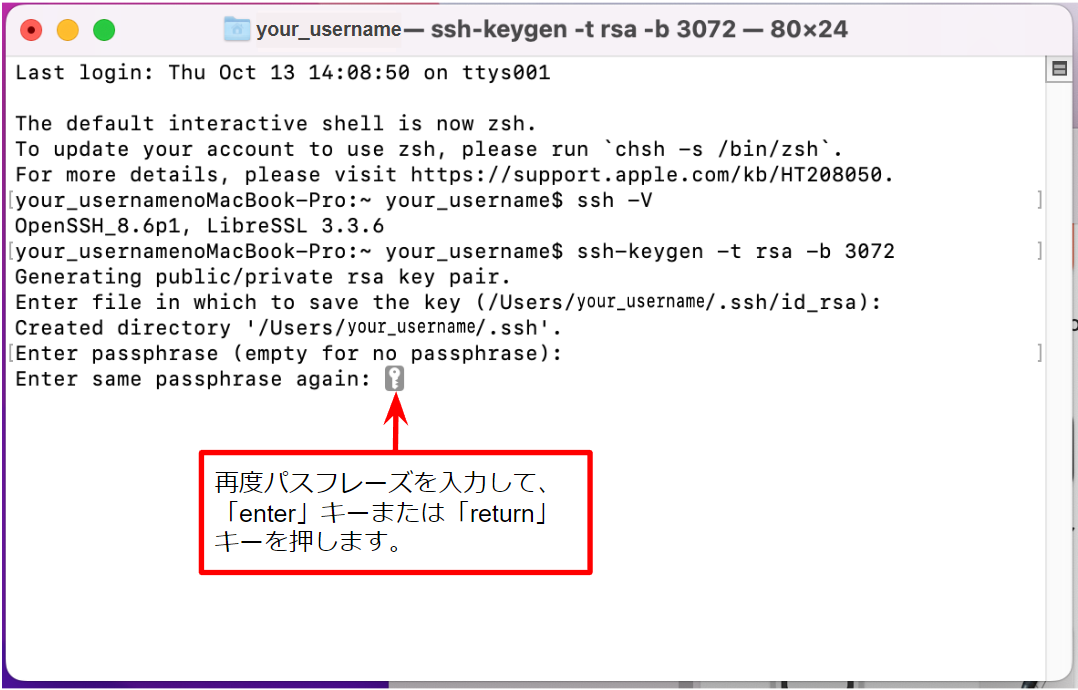
The message Enter same passphrase again: will be displayed. Enter the same passphrase as entered above and press the 'enter' or 'return' key.
❗ After entering the passphrase, the screen remains as shown below and nothing changes. While entering the passphrase, the screen also remains as shown below and nothing changes, but do not worry about it and continue entering. When you have finished typing, press the 'enter' or 'return' key.
You will then see the following screen.
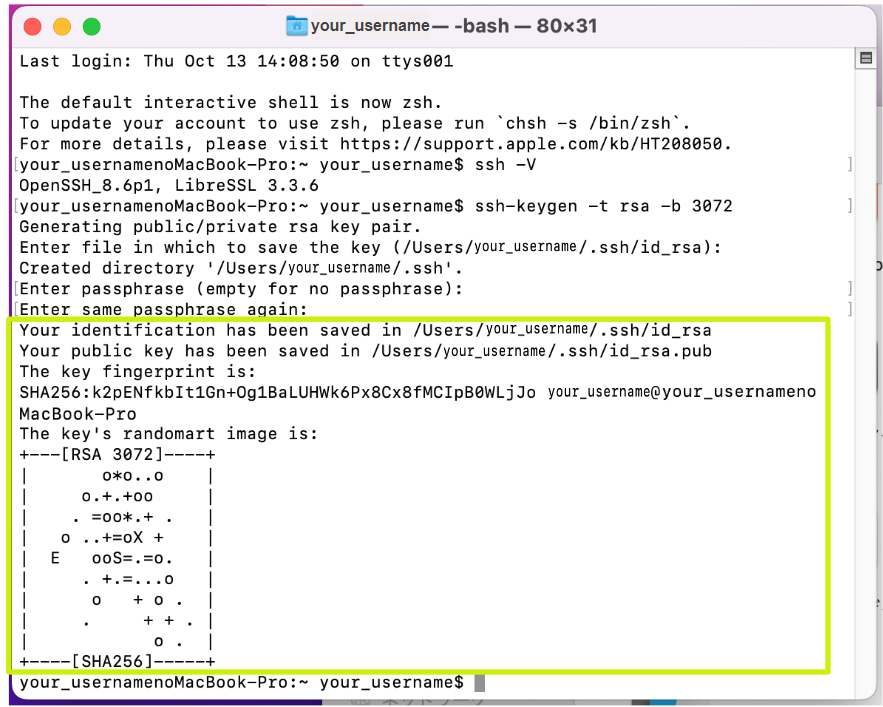
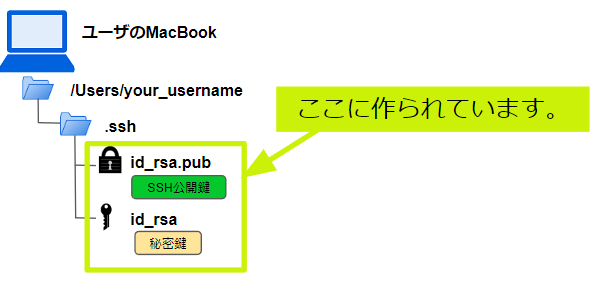
♦Check the existence of the SSH public key and private key you created
Check that the SSH public key and private key are indeed created in the directory /Users/your_username/.ssh/.
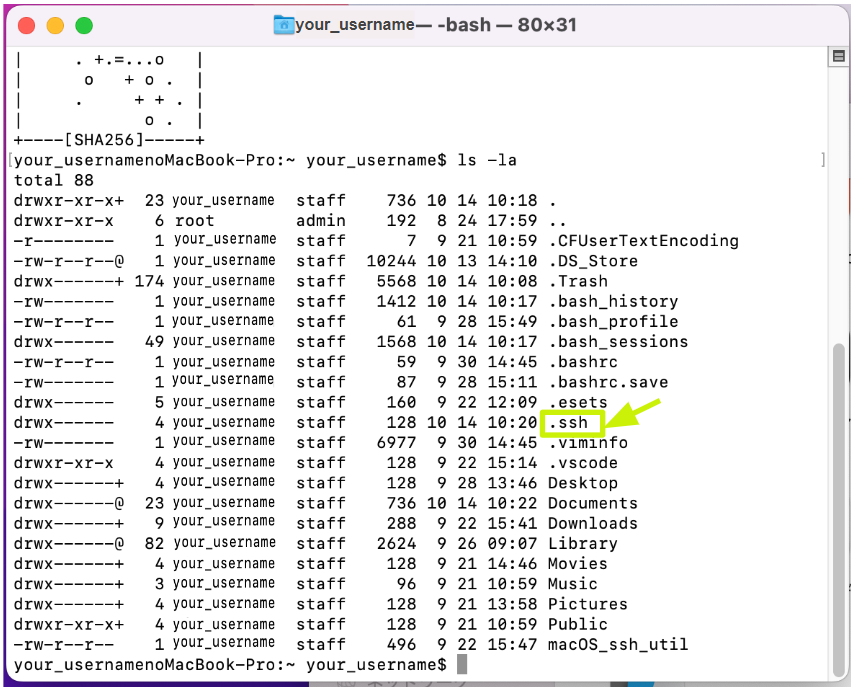
First, to check that the directory named .ssh has really been created, type the following command and press the 'enter' or 'return' key.
ls -la

Then, you can confirm the existence of a directory named .ssh in the directory /Users/your_username as the following screen.
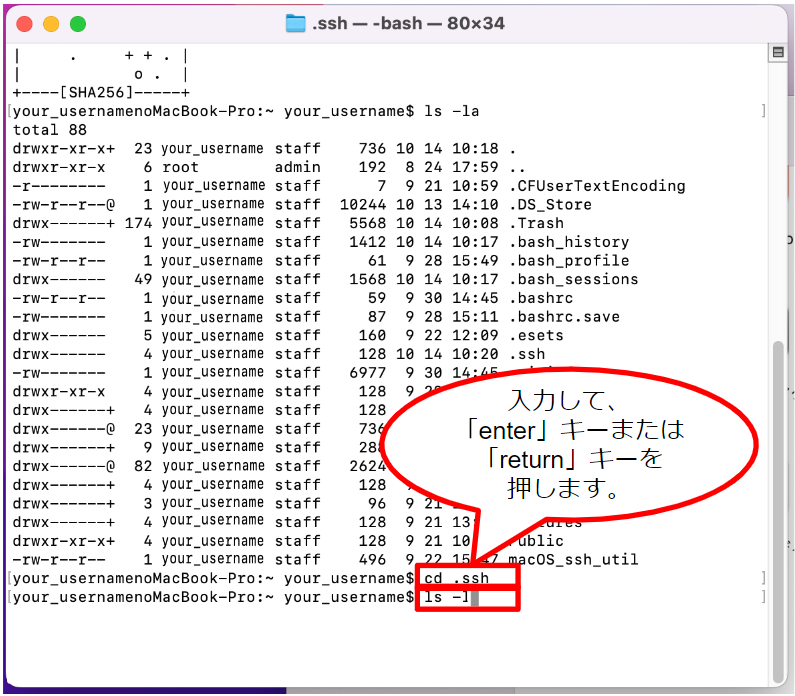
Then, move into the directory named .ssh to check that the SSH public key and private key have indeed been created.
To move into .ssh, type the following command and press the 'enter' or 'return' key.
cd .ssh
Continue by typing the following command and pressing the 'enter' or ``return' key to check that the SSH public and private keys have indeed been created.
ls -l
you can confirm that the SSH public and private keys have indeed been created as the following screen.

♦Check the SSH public key you created
Type the following command and press the 'enter' or 'return' key to check the contents of the SSH public key you created.
cat id_rsa.pub
Then, the contents of the SSH public key you created are output, as shown in the following screen. It is written in the string.